Call Routing • 3 min read
How to Use a Call Menu (IVR) in Twilanswer
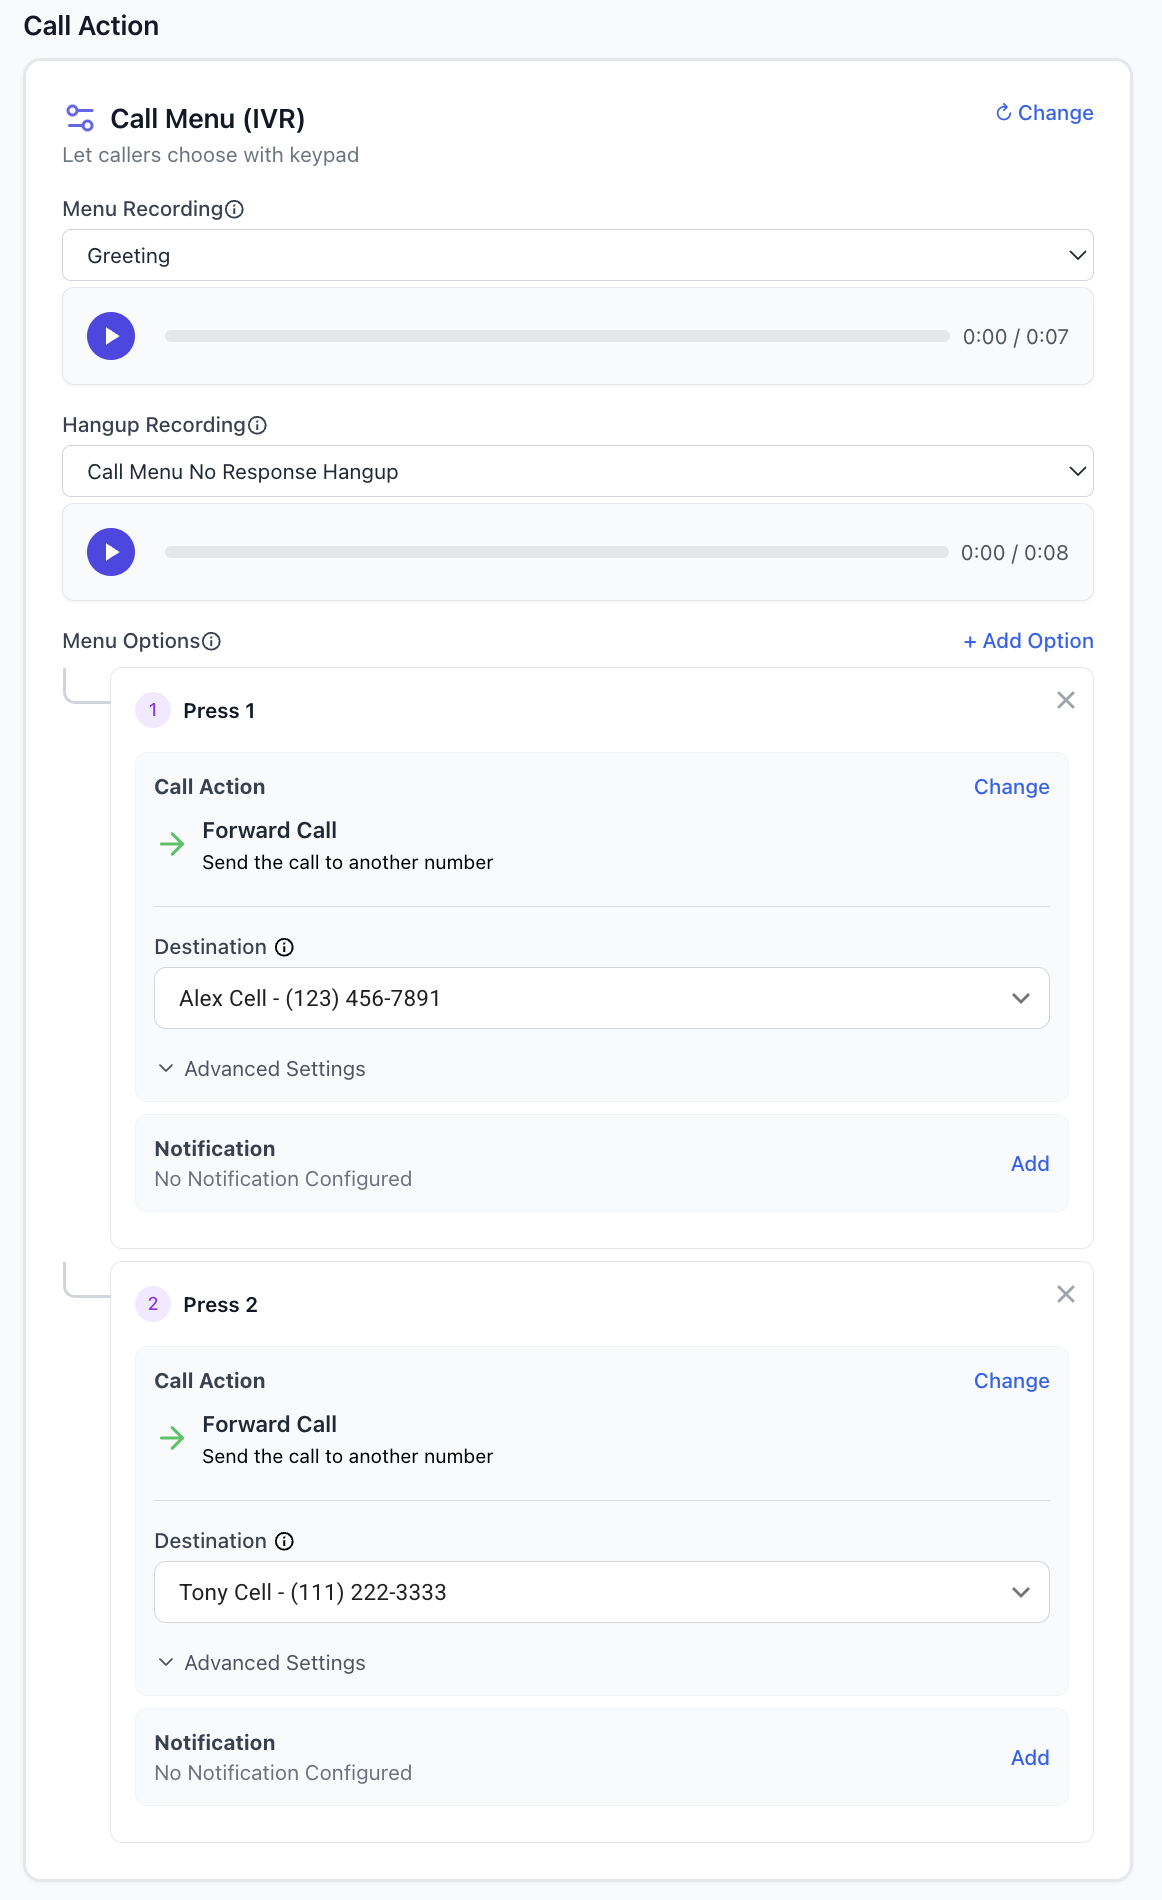
Build a press-1-for-sales style menu on a call route: prompts, timeouts, up to ten options, per-option actions and hours, plus route-level defaults.
A call menu (also called an IVR, or interactive voice response) is a call action you add to a call route—the same place you choose forwarding, voicemail, play message, and other actions. On the surface it behaves like a familiar phone tree: “Press 1 for Sales, press 2 for Support” (you define the digits and what each one does). Under the hood, Twilanswer runs several steps: greeting, timeout handling, and per-option routing you configure.
Plan: Call menus are available on the Team and Custom plans. They are not available on the Solo plan. Upgrade to Team or Custom (including trials that include those features) to use this action.
Recordings you must choose
Menu recording
The menu recording plays as soon as the call menu action runs. Use it to explain the keypad choices (for example which department or person each digit reaches). Callers listen to this before Twilanswer waits for a keypress.
Hang up recording
If the caller does not press a valid option, Twilanswer waits 10 seconds. If there is still no response, the call is disconnected. Right before hanging up, Twilanswer plays your hang up recording so the caller knows what happened—for example:
“Sorry—we didn’t get a response. Please try again later.”
Record your own wording to match your brand; the important part is that callers aren’t dropped in silence after the timeout.
Menu options (digits 1–10)
You must configure at least one menu option and you can define up to 10 (one per digit, as supported in the product).
For each option you choose:
- A call action (forward to a specific person, send to voicemail, another menu, etc.).
- Notifications for that path, so—for example—press 1 could ring Joe’s cell and notify Joe’s email or Slack, while press 2 rings Susie with her notification targets.
That lets you build flows like press 1 for Joe, press 2 for Susie, with different destinations and alerts per option.
Route-level notifications vs. option-level notifications
You can still set notifications on the whole route (for example every call also notifies a shared Front inbox or team Slack channel). Separately, each menu option can have its own notifications. Use route-level alerts when you want a common destination for all traffic, and option-level alerts when each branch should notify different people or channels—or combine both when you want a shared inbox plus per-person alerts.
Business hours: route vs. per option
Call menus support different business hours per menu option, but you cannot mix the two models in conflicting ways:
- If you set business hours at the route level, use that single schedule for the route as a whole.
- If you need different hours per option (for example Joe stops at 5:00 p.m. and Susie at 7:00 p.m.), you typically do not use route-level business hours; instead you configure hours (and off-hours behavior) on each call option so each branch can send to voicemail or another action on its own schedule.
That pattern fits teams where each destination has its own working hours—for instance after 5:00 p.m. for Joe the menu might send his line to voicemail, while Susie’s option still rings until 7:00 p.m.
To add audio used in the menu or timeout prompts, use Recordings in Twilanswer or see How to Create a Live Recording in Twilanswer and How to Upload a Recording in Twilanswer.